
Discover the convenience of instant pudding mix‚ a quick and delicious dessert solution made from dry ingredients like sugar‚ starch‚ and flavorings‚ perfect for versatile treats.
Overview of Instant Pudding Mix
Instant pudding mix is a popular convenience food made from a blend of sugar‚ starches‚ and flavorings. It allows for quick dessert preparation by simply mixing with milk. The mix dissolves easily‚ creating a smooth‚ creamy texture. Available in flavors like vanilla and chocolate‚ it’s ideal for pies‚ cakes‚ or standalone treats. Store-bought options are widely available‚ but homemade versions offer customization. This versatile mix simplifies dessert-making‚ catering to both home cooks and professional bakers seeking efficiency without compromising taste. Its ease of use and adaptability make it a staple in many kitchens.
Benefits of Using Instant Pudding Mix
Instant pudding mix offers unmatched convenience‚ allowing for quick and effortless dessert preparation. It ensures consistent results with minimal effort‚ perfect for home cooks and professionals alike. The mix is versatile‚ suitable for pies‚ cakes‚ and standalone treats‚ while its long shelf life makes it a practical pantry staple. Cost-effective and customizable‚ it accommodates dietary preferences like dairy-free or vegan options. With instant pudding mix‚ delicious desserts are just minutes away‚ making it a time-saving solution for any occasion. Its ease of use and reliability ensure satisfaction every time.
Ingredients and Tools Needed
Essential ingredients include milk‚ sugar‚ starches‚ and flavorings like vanilla or cocoa. Tools like mixers‚ bowls‚ and measuring cups ensure smooth preparation of instant pudding mix desserts.
Common Ingredients in Instant Pudding Mix
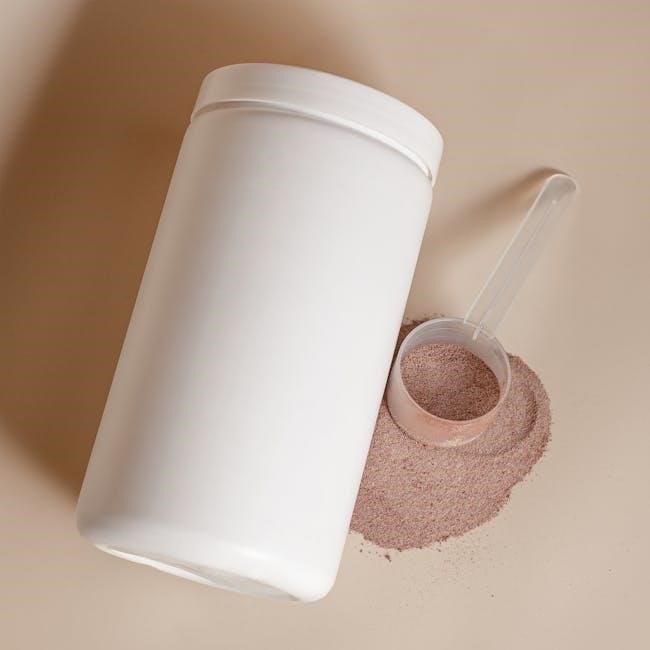
The mix typically includes granulated sugar‚ cornstarch or modified cornstarch like Clear Jel‚ milk powder‚ and flavorings such as vanilla or cocoa. Sugar adds sweetness‚ while starches provide thickness and structure. Milk powder enhances creaminess and flavor. Salt balances sweetness‚ and natural flavorings like vanilla beans or cocoa powder add distinct tastes. Optional ingredients include turmeric for color or nutmeg for extra depth. These components combine to create a versatile base for various pudding flavors‚ ensuring a smooth and creamy texture when mixed with milk.
Specialized Tools for Preparing Pudding
Preparing instant pudding requires a few essential tools for smooth and efficient mixing. A large mixing bowl is ideal for combining the pudding mix and milk. A wire whisk or handheld mixer ensures thorough blending to avoid lumps. Measuring cups and spoons are crucial for accurate proportions of mix and milk. A spatula helps scrape the bowl for even distribution. Small serving bowls or ramekins are perfect for chilling individual portions. For homemade mixes‚ a food processor or blender is useful for grinding ingredients into a fine powder. A mason jar is great for storing homemade pudding mix for later use.
Step-by-Step Instructions for Making Instant Pudding
Pour cold milk into a mixing bowl‚ add the pudding mix‚ and whisk until smooth. Continue mixing for 1-2 minutes until thickened‚ then pour into bowls and chill.
Preparing the Mixing Bowl and Milk
Start by selecting a clean‚ dry mixing bowl and chilling it in the refrigerator for a few minutes. Measure 2 cups of cold milk for a smaller pudding mix packet or 3 cups for a larger one. Use whole milk‚ skim milk‚ or plant-based alternatives like almond or coconut milk for dietary preferences. Ensure the milk is well-chilled to help the pudding set faster and achieve a smoother texture. Pour the milk into the bowl and prepare for the next step by adding the pudding mix. A large bowl is recommended to avoid spills during mixing.
Adding the Pudding Mix and Mixing
Open the instant pudding mix packet and pour its contents into the bowl with the prepared milk. Use a whisk‚ electric mixer‚ or food processor to blend the mixture thoroughly. Stir vigorously for about 2 minutes until the pudding mix dissolves completely and the mixture thickens. If lumps form‚ continue mixing until they disappear. The goal is to achieve a smooth‚ even consistency. Overmixing can lead to a too-stiff texture‚ so stop once the pudding reaches your desired thickness. This step ensures the flavors are evenly distributed and the pudding is creamy and lump-free.
Chilling and Serving the Pudding
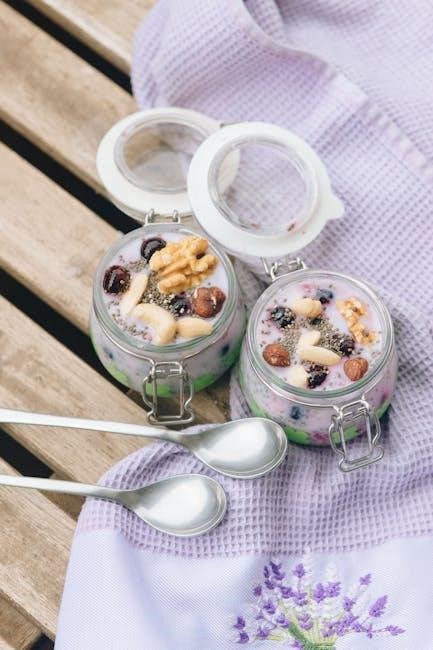
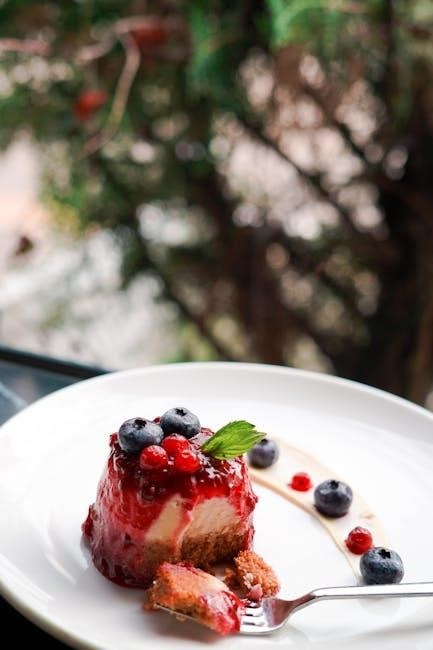
Pour the mixed pudding into individual serving bowls or a large serving dish. Cover with plastic wrap or a tight-fitting lid to prevent a skin from forming. Chill in the refrigerator for at least 5 minutes to allow the pudding to set and thicken. Serve cold for the best texture. Optionally‚ garnish with whipped cream‚ fresh fruit‚ or a sprinkle of cocoa powder for added appeal. For a fancier touch‚ layer the pudding with cookies‚ nuts‚ or caramel sauce before serving. This step ensures a refreshing and visually appealing dessert ready to enjoy.
Flavor Variations and Customizations
Explore diverse flavors like vanilla‚ chocolate‚ or butterscotch by adjusting the mix. Customize with add-ins such as fruits‚ nuts‚ or spices to create unique and personalized pudding treats easily.
Vanilla Pudding Variations
Vanilla pudding is a timeless favorite‚ offering a creamy and versatile base for customization. To make a homemade vanilla pudding mix‚ combine sugar‚ cornstarch‚ and vanilla bean powder. For added richness‚ scrape real vanilla beans into the mix for a deeper flavor. This blend can be stored for up to a year‚ making it a convenient pantry staple. When preparing‚ mix 1 cup of the powder with 2 cups of milk for a smooth‚ creamy texture. Experiment with additions like fresh fruit‚ nuts‚ or a drizzle of caramel to elevate this classic dessert into a personalized treat.
Chocolate Pudding Variations
Indulge in rich‚ chocolatey treats with instant chocolate pudding mix. Combine sugar‚ Dutch-process cocoa powder‚ and a touch of salt for a decadent base. To enhance flavor‚ add a teaspoon of vanilla bean powder. For a no-cook option‚ mix 1 cup of the powder with 2 cups of milk until smooth. Customize by incorporating melted chocolate or espresso for depth. Top with whipped cream or chocolate shavings for a luxurious dessert. This mix is perfect for pies‚ cakes‚ or as a quick treat‚ offering versatility and convenience for chocolate lovers of all ages.
Troubleshooting Common Issues
Resolve lumps by whisking thoroughly or straining the mixture. Adjust consistency by adding more milk for a thinner texture or letting it chill longer for thickness.
Fixing Lumps in the Pudding
If lumps form while mixing‚ don’t panic! Strain the mixture through a fine-mesh sieve to remove any clumps. Alternatively‚ whisk vigorously until smooth. For persistent lumps‚ blend the mixture in a food processor or use a handheld mixer to ensure even texture. To prevent lumps‚ sift the pudding mix before adding milk and whisk continuously during mixing. Cold milk helps the mix dissolve evenly‚ reducing the risk of lumps. A smooth pudding is just a few extra steps away!

Adjusting Consistency and Texture
For a thicker pudding‚ add a little more mix or let it chill longer. If too thick‚ stir in a splash of milk. For a creamier texture‚ use whole milk or a milk alternative like coconut or almond milk. To achieve the perfect consistency‚ ensure the mix is well-dissolved and the mixture is chilled adequately. Experiment with ratios of mix to milk to suit your preference. Adjustments are simple‚ allowing you to customize the texture to your liking‚ whether you prefer it light and airy or rich and dense. Perfecting the consistency enhances the overall dessert experience.
Health and Safety Considerations
Always check expiration dates and store mixes in a cool‚ dry place. Be aware of allergens like milk and gluten. Use fresh milk for safety.
Allergens and Dietary Restrictions
Instant pudding mixes may contain allergens like dairy‚ gluten‚ and soy. Always check labels for potential allergens. For dietary restrictions‚ opt for gluten-free mixes or use dairy-free milk alternatives like coconut or almond milk. Vegan versions can be made by substituting traditional milk with plant-based options. Ensure all ingredients align with your dietary needs before preparation. Store mixes in a cool‚ dry place to maintain freshness and safety. Proper storage helps prevent spoilage and ensures the mix remains usable for a longer period. Always verify expiration dates and ingredient lists to accommodate specific dietary requirements effectively.
Storage and Shelf Life of Pudding Mix
To maintain freshness‚ store instant pudding mix in a cool‚ dry place away from direct sunlight and moisture. The mix typically has a shelf life of up to 12 months when stored properly. Ensure the container is airtight to prevent absorption of odors or humidity. Avoid exposure to heat sources or open flames. Always check the expiration date on the packaging before use. For homemade mixes‚ store them in a sealed mason jar or ziplock bag to preserve quality. Proper storage ensures the mix remains effective and ready for use whenever needed.
Expert Tips and Tricks
Enhance flavor by adding vanilla beans or cocoa powder. Use alternative milks for dietary needs. Experiment with mix-ins like fruits or nuts for unique desserts.
Enhancing Flavor and Texture
To elevate your instant pudding‚ try adding vanilla beans or cocoa powder for richer flavors. Use turmeric for a vibrant yellow hue in vanilla pudding. For chocolate pudding‚ incorporate Dutch-process cocoa for depth. Mix-ins like fresh fruits or nuts add texture and freshness. Experiment with alternative milks‚ such as almond or coconut‚ for dairy-free options. To enhance creaminess‚ blend in a tablespoon of cornstarch or Clear Jel before mixing. Layer pudding with whipped cream or cookies for a show-stopping dessert. These tweaks transform basic pudding into a decadent‚ customizable treat.
Using Pudding Mix in Baking and Desserts
Instant pudding mix is a versatile ingredient for baking and desserts. Combine it with cream cheese and whipped cream for a rich filling in cakes or pastries; Use it as a base for pies‚ layer it in trifles‚ or mix into cake batter for added moisture and flavor. For a quick dessert‚ blend pudding mix with milk and pour into pre-made crusts. It’s also perfect for icebox cakes‚ parfaits‚ or as a topping for fresh fruits. This mix simplifies dessert preparation while offering endless creative possibilities for both novice and experienced bakers.
Instant pudding mix offers a delicious‚ convenient‚ and versatile way to create sweet treats‚ perfect for any occasion‚ ensuring a quick and satisfying dessert experience every time.
Final Thoughts on Making Instant Pudding
Making instant pudding is a simple and rewarding process that offers endless customization. With a homemade mix‚ you can enjoy a quick‚ delicious dessert tailored to your preferences. Whether you’re using store-bought or DIY mixes‚ the process is straightforward—just combine with milk and chill. Experiment with flavors like vanilla or chocolate‚ and enhance with toppings or mix-ins for added delight. Perfect for last-minute treats or special occasions‚ instant pudding is a versatile and crowd-pleasing option. Plus‚ homemade mixes are healthier and free from preservatives‚ making it a great choice for families and those with dietary restrictions. Give it a try and enjoy the convenience!