The Honeywell 4000 Thermostat is a 5-2 day programmable model designed for energy efficiency and ease of use. It features a backlit display and simple programming.
1.1 Overview of the Honeywell 4000 Thermostat
The Honeywell 4000 Thermostat is a 5-2 day programmable model designed for energy efficiency and ease of use. It features a backlit display, simple programming, and compatibility with conventional and heat pump systems. This thermostat is ideal for homeowners seeking a balance between functionality and affordability. Its pre-programmed settings and adaptive recovery capabilities make it user-friendly while promoting energy savings. Installation is straightforward, requiring basic tools and compatibility checks.
1.2 Key Features and Benefits
The Honeywell 4000 Thermostat offers 5-2 day programmability, optimizing energy savings and comfort. Its adaptive intelligent recovery learns your system’s behavior to maintain consistent temperatures. Emergency heat configuration ensures reliability in extreme conditions. Compatible with both conventional and heat pump systems, it features a backlit display for easy readability. Battery backup options and straightforward programming make it user-friendly, while its compact design fits seamlessly into any home decor, enhancing functionality without compromising style.

Pre-Installation Requirements
Ensure system compatibility with your HVAC setup. Verify wiring configuration matches the thermostat’s requirements. Gather necessary tools and materials for a smooth installation process.
2.1 System Compatibility Check
Verify your HVAC system type, such as conventional or heat pump, matches the Honeywell 4000’s compatibility. Ensure the thermostat supports your system’s stage configuration. Check voltage requirements and wiring connections. Compatibility ensures proper functionality and avoids installation issues. Refer to the manual for detailed specifications to confirm suitability with your current setup before proceeding.
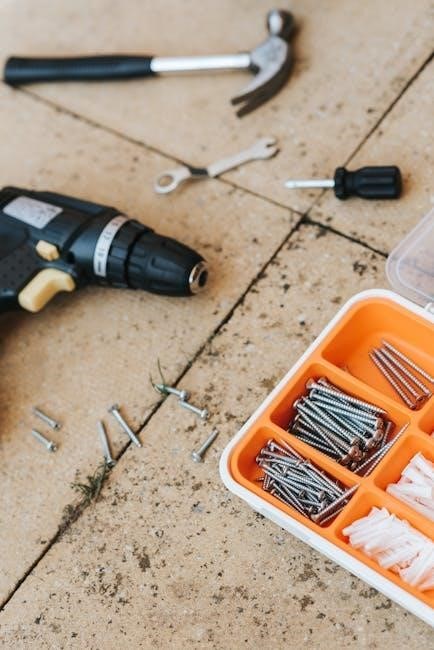
2.2 Tools and Materials Needed
Gather necessary tools: screwdrivers (flathead and Phillips), wire strippers, pliers, and a drill. Materials include wall anchors, screws, and the thermostat’s wall plate. Ensure you have the Honeywell 4000 thermostat unit and its optional cover plate. Refer to the manual for specific requirements. Having all items ready ensures a smooth installation process and minimizes delays. Double-check the packaging for any additional components provided.
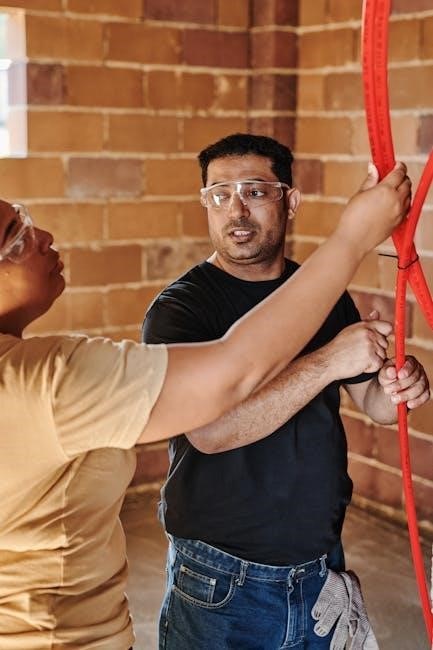
Installation Steps
Mount the wall plate, connect wires, and install the thermostat unit. Turn off power, remove old thermostat, and prepare the wall for the new installation.
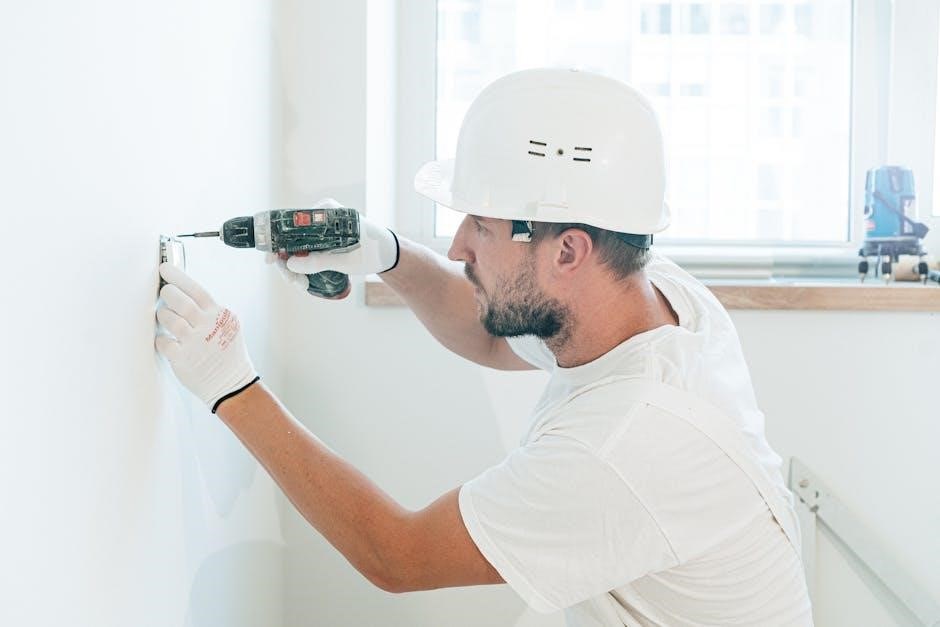
3.1 Mounting the Wall Plate
Begin by removing the old thermostat and turning off the power. Align the wall plate with the mounting screws, ensuring it is centered and level. Drill pilot holes if necessary, then secure the plate to the wall using the provided screws. If the optional cover plate is not needed, refer to the UWP mounting system instructions. Once mounted, insert the batteries and set the system switch to the correct position.
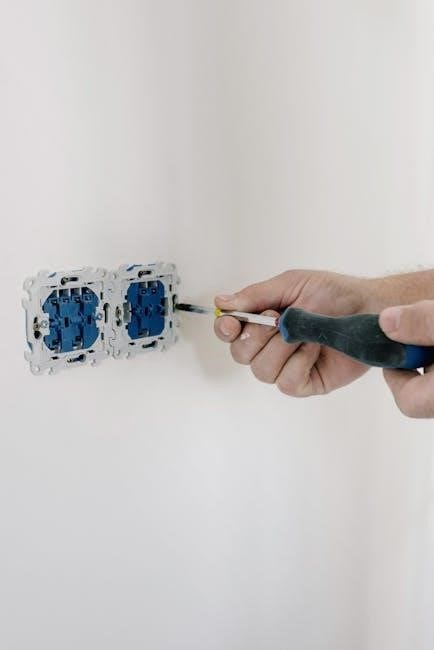
3.2 Connecting Wires to the Thermostat
Refer to the wiring diagram to match each wire to the correct terminal (R, W, Y, G, O, L, C, B). Securely connect wires to avoid loose connections. For emergency heat, install a jumper between Aux and E if no relay is present. Ensure proper wiring for heat pumps. Double-check all connections before restoring power to ensure smooth operation.
3.3 Installing the Thermostat Unit
Mount the thermostat unit to the wall plate, ensuring it clicks securely into place. Gently pull to confirm it’s properly attached. Insert the batteries if required for backup power. Set the time and date, then verify all functions operate correctly. Ensure the system switch is set to the appropriate mode (Heat/Cool). Double-check all connections and settings before testing the thermostat’s operation.

Wiring Guide
The Honeywell 4000 supports both conventional and heat pump systems. Connect wires according to the diagram: R, W, Y, G, O, L, B, C, Aux, E.
4.1 Understanding the Wiring Diagram
The wiring diagram is essential for proper installation. Identify terminals (R, W, Y, G, O, L, B, C, Aux, E) and their functions. For conventional systems, connect R to Rh, W to W1, and Y to Y1. Heat pump systems require O or B connections. Refer to the manufacturer’s diagram for specific configurations. Ensure correct wire connections to avoid system malfunctions. Double-check all terminals before powering on the thermostat.
4.2 Connecting to Conventional and Heat Pump Systems
For conventional systems, connect R to Rh, W to W1, Y to Y1, and G to fan terminals. Heat pump systems require O or B terminals for auxiliary heat. Ensure proper connections to avoid malfunctions. Refer to the wiring diagram for specific configurations. If no emergency heat relay exists, install a jumper between Aux and E terminals. Double-check all connections before powering on the thermostat to ensure correct operation.
Configuration and Setup
Set the time and date, then program your schedule. Insert batteries if needed for backup power. Follow on-screen prompts to customize settings for optimal performance.
5.1 Setting the Time and Date
Press the SET button to enter time and date settings. Use the up or down arrows to adjust the time and date, then press DONE to confirm. Ensure the time zone is set correctly for accurate scheduling. Some models may require switching to a specific mode before accessing these settings. Proper time and date setup is essential for programming schedules and maintaining consistent heating or cooling operations. Refer to the manual for detailed instructions if needed.
5.2 Programming Schedule Settings
Press the SET button and select the desired day(s) using the up/down arrows. Choose the wake, leave, return, and sleep times to set temperature preferences. Adjust the temperature using the arrows and press DONE to save. Repeat for each day or copy settings across multiple days. Ensure the schedule aligns with your daily routine for optimal energy efficiency. Refer to the manual for advanced programming options and customizations. Proper scheduling ensures consistent comfort and energy savings throughout the week.
Advanced Features Setup
Access advanced features like Adaptive Intelligent Recovery and Emergency Heat through the setup menu. These options optimize performance and prevent system damage during extreme conditions.
6.1 Adaptive Intelligent Recovery
The Honeywell 4000 Thermostat features Adaptive Intelligent Recovery, which learns your system’s heating and cooling times to pre-heat or cool your home, ensuring the set temperature is reached on schedule. This advanced feature optimizes energy use and enhances comfort by predicting and adjusting based on historical performance. Enable it via the setup menu for improved efficiency and consistent temperature control.
6.2 Emergency Heat Configuration
Emergency heat configuration ensures your system switches to a backup heat source when needed. This is crucial for maintaining comfort during primary heating system failures.
Connect the wires to the emergency heat terminals and enable the feature in the thermostat menu. If no emergency heat relay is present, install a field jumper between Aux and E terminals for proper operation.
Mounting the Optional Cover Plate
The optional cover plate enhances the thermostat’s appearance without affecting functionality. Install it for a sleek look or added protection, aligning with your home decor seamlessly.
7.1 When to Use the Cover Plate
The optional cover plate is ideal for protecting the Honeywell 4000 thermostat from dust and tampering, enhancing its appearance, and covering wall imperfections. Use it in high-traffic areas or when the UWP mounting system isn’t needed for a sleek, uniform look that complements your home decor.
7.2 Installation Steps for the Cover Plate
First, ensure the Honeywell 4000 thermostat is mounted securely. Align the cover plate with the wall plate, ensuring proper fit. Gently snap it into place without forcing. Use provided screws if additional security is needed. Avoid over-tightening to prevent damage. This installation enhances the thermostat’s appearance and protects it from environmental factors, ensuring optimal performance and longevity of the device.
Troubleshooting Common Issues
Address common problems like display malfunctions or wiring errors by checking connections and ensuring proper installation. Refer to the manual for detailed solutions and repair guidance.
8.1 Common Installation Mistakes
Common installation mistakes include incorrect wiring connections, such as misidentifying R and Rc wires, and forgetting to set the system switch to Heat or Cool. Improper mounting of the wall plate, such as not leveling it, can cause inaccurate temperature readings. Additionally, not turning off power before starting installation risks damage to the thermostat or HVAC system. Always ensure compatibility with your HVAC system and follow the manual’s wiring guide carefully to avoid these issues.
8.2 Solving Display or Wiring Problems
If the display is blank or unresponsive, check the circuit breaker or fuse. Ensure batteries are installed correctly or AC power is connected. For wiring issues, verify all connections match the diagram in the manual. Common errors include loose wires or incorrect terminal assignments. Reset the thermostat by removing batteries or power for 30 seconds. If issues persist, consult the troubleshooting guide or contact Honeywell support for assistance. Always turn off power before adjusting wires to avoid damage.

Safety Precautions
Always turn off power at the circuit breaker before installation or maintenance. Avoid over-tightening wires, which can damage terminals. Use correct battery type to prevent corrosion.
9.1 Avoiding Equipment Damage
To prevent equipment damage, always disconnect power before installation or repairs. Avoid over-tightening wires, as this can damage terminal connections. Ensure all tools used are insulated to prevent electrical shocks. Never expose the thermostat to excessive moisture or extreme temperatures; Use only compatible batteries, as specified in the manual, to avoid corrosion or malfunction. Regularly inspect wires for signs of wear or damage. Follow all manufacturer guidelines strictly to maintain warranty and ensure safe operation.
9.2 Battery Installation and Maintenance
Install fresh batteries as specified in the manual to ensure proper function. Use the correct battery type to avoid damage. Replace batteries promptly when the ‘REPLACE BATT’ warning appears. Ensure batteries are installed correctly to maintain system reliability. Avoid using damaged or corroded batteries, as they can cause malfunctions. Regularly check battery health to prevent unexpected system issues. Always follow Honeywell’s guidelines for battery maintenance to ensure optimal performance and longevity of your thermostat.
Maintenance and Upkeep
Regularly clean the thermostat display and check for software updates to ensure optimal performance. Maintain proper battery health and inspect wiring for any potential damage or wear.
10.1 Cleaning the Thermostat
Regular cleaning ensures optimal performance. Power off the thermostat and gently wipe the display with a soft, dry cloth. Avoid harsh chemicals or abrasive materials. For stubborn marks, lightly dampen the cloth with water, but ensure no moisture enters the unit. Check for dust or debris near vents or sensors and remove it with compressed air. Clean the device monthly to maintain accuracy and functionality.
10.2 Regular Software Updates
Keep your Honeywell 4000 Thermostat up-to-date by checking for software updates regularly. These updates enhance functionality, improve performance, and add new features. To update, visit Honeywell’s official website or use the Honeywell Home app. Follow the provided instructions carefully to ensure a smooth update process. Always back up settings before updating to avoid losing programmed preferences. Regular updates ensure your thermostat operates at peak efficiency and security.
Additional Resources
Visit Honeywell’s official website for comprehensive guides, downloadable manuals, and customer support. Contact Honeywell at 1-800-468-1502 for assistance or access the Honeywell Home app for more resources.
11.1 Downloading the Honeywell 4000 Manual
The Honeywell 4000 manual is available for free download on Honeywell’s official website and platforms like ManualsLib. It includes detailed installation guides, wiring diagrams, and troubleshooting tips. The manual covers programming schedules, advanced features, and maintenance instructions. Download the PDF to access step-by-step instructions for setup and configuration. Ensure you have the correct model number, such as PRO 4000 Series, for accurate guidance. This resource is essential for optimal thermostat performance and customization.
11.2 Contacting Honeywell Customer Support
Honeywell Customer Support is available to assist with any questions or issues regarding the Honeywell 4000 Thermostat. You can reach them toll-free at 1-800-468-1502 or visit their official website for online support options. Additionally, Honeywell offers email support, live chat, and an extensive library of FAQs and troubleshooting guides. Their team is ready to help with installation, programming, or maintenance concerns, ensuring your thermostat operates efficiently. Contact them for personalized assistance anytime.
The Honeywell 4000 Thermostat offers a user-friendly, energy-efficient solution for home comfort. With its programmable features, adaptive recovery, and easy installation, it simplifies temperature control. Proper setup and maintenance ensure optimal performance. By following the manual, users can maximize energy savings and enjoy consistent comfort. This guide provides comprehensive support, from installation to troubleshooting, making the Honeywell 4000 a reliable choice for modern heating and cooling needs.