
Singer Sewing Machine Instruction Manual: A Comprehensive Guide
Discover a detailed resource for your Singer machine, offering guidance from basic setup to advanced techniques, ensuring successful sewing projects.
Singer sewing machines boast a rich history, evolving from innovative designs to become a household name synonymous with quality and reliability. This manual aims to unlock the full potential of your machine, regardless of your skill level. From the earliest models to today’s computerized versions, Singer has consistently provided tools for creative expression and practical garment construction.
Understanding the foundational principles of operation, as detailed within this guide, will empower you to tackle a wide range of sewing projects. Whether you’re a beginner or an experienced seamstress, this resource will serve as your companion on your sewing journey, ensuring enjoyable and successful results.
Understanding Your Specific Model
Each Singer sewing machine, while sharing core functionalities, possesses unique features and specifications. Identifying your exact model number is crucial for accessing the most relevant information and troubleshooting guidance. This number is typically located on a plate on the machine itself.
Referencing your model’s specific documentation – often available online through Singer’s support resources – will clarify any variations in threading procedures, stitch options, or accessory compatibility. Familiarizing yourself with these nuances ensures optimal performance and prevents potential issues. This manual provides general guidance, but model-specific details are paramount.
Key Components and Their Functions
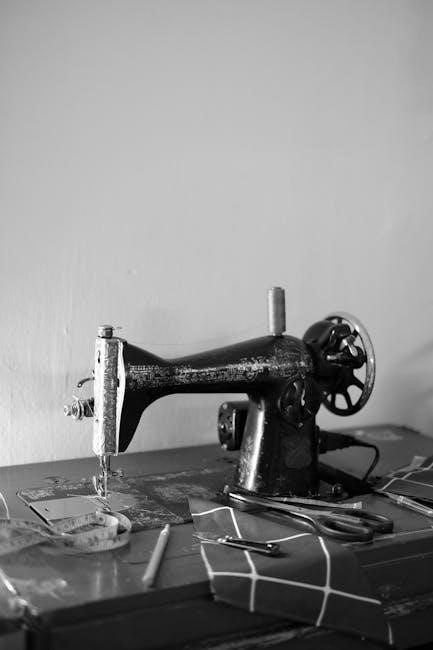
Singer sewing machines comprise several essential parts working in harmony. The spool pin holds the upper thread, while the bobbin, housed below, provides the lower thread. The needle, guided by the presser foot, creates stitches as fabric is moved.
The handwheel allows manual control, and the power switch initiates the motor. Understanding each component’s role is vital for setup and operation. Proper interaction with these elements ensures smooth, consistent stitching and prevents damage to the machine or fabric. Regular inspection maintains functionality.
The Spool Pin and Bobbin Winding
The spool pin securely holds the thread spool, ensuring smooth unwinding during sewing. Different Singer models may have varied pin types – vertical or horizontal. Bobbin winding prepares the lower thread. Guide the thread from the spool to the bobbin winder tension disc, then onto the bobbin.
Engage the bobbin winder and start the machine; it will automatically stop when full. Correct tension is crucial for even stitches. A properly wound bobbin is essential for consistent lower thread delivery, preventing looping or thread breakage.
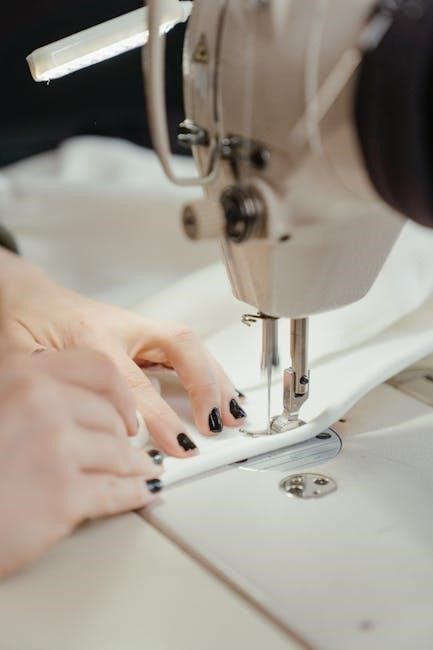
Needle and Presser Foot Mechanisms
The needle mechanism drives the needle up and down, creating stitches. Ensure the correct needle type is used for your fabric – universal, ballpoint, or denim. Presser foot pressure controls fabric feed; adjust it for different materials. Lighter fabrics need less pressure, while heavier fabrics require more.
The presser foot holds the fabric firmly against the feed dogs, which advance the material under the needle. Proper foot selection and pressure adjustment are vital for achieving even, consistent stitches and preventing fabric puckering or slipping.

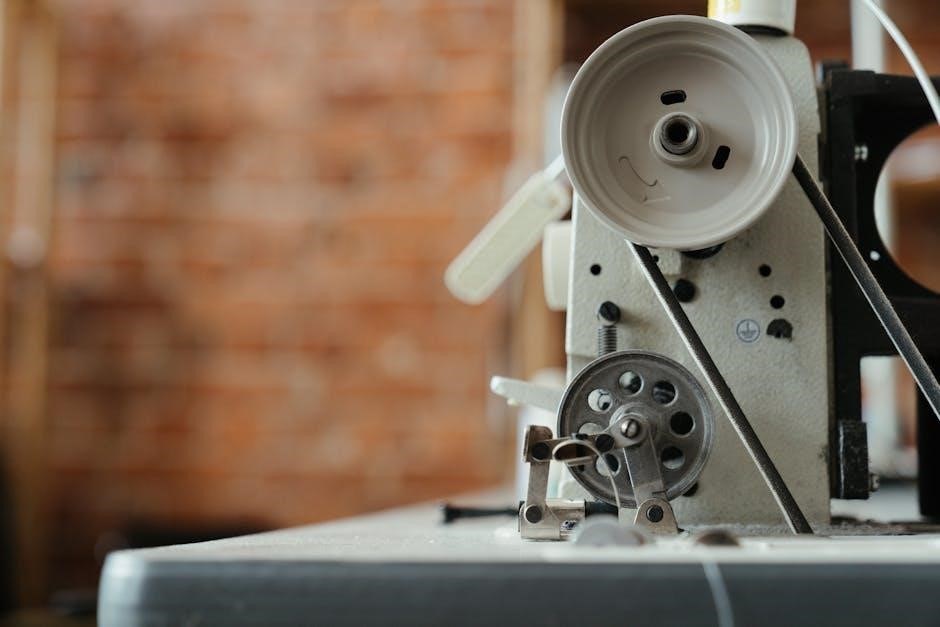
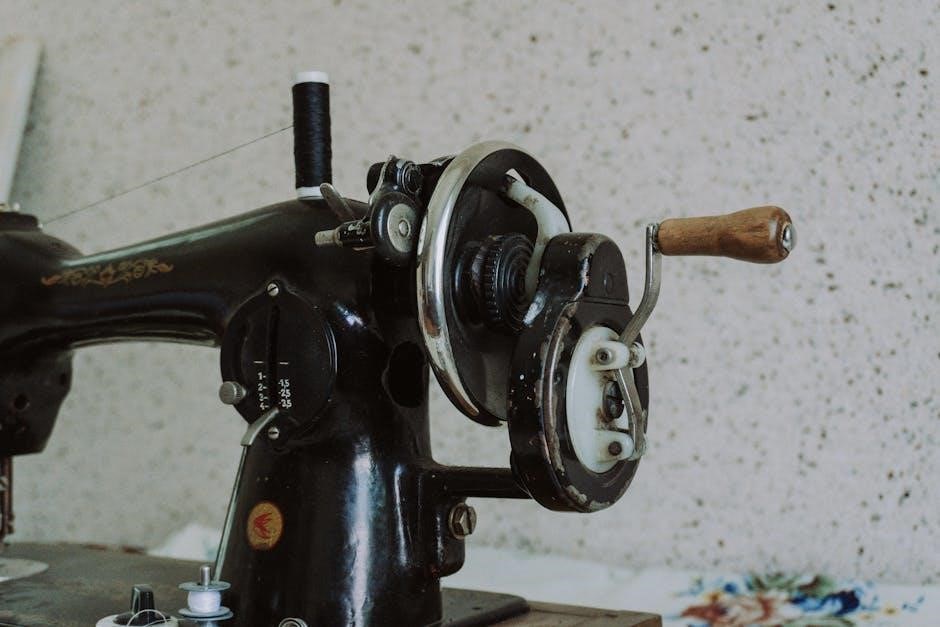
The Handwheel and Power Switch
The handwheel allows manual control of the needle, useful for precise positioning or when power isn’t available. Always turn it towards you. The power switch controls the machine’s operation; ensure it’s switched off when threading or changing the needle.
Understanding these controls is crucial for safe and efficient operation. Never force the handwheel. The power switch should be firmly in the ‘off’ position during maintenance. Familiarize yourself with their locations and functions before beginning any sewing project.
Setting Up Your Singer Sewing Machine
Proper setup is vital for optimal performance. Begin by placing your machine on a stable, level surface. Ensure adequate lighting for clear visibility. Next, connect the power cord and verify the voltage compatibility. Familiarize yourself with the key components – spool pin, bobbin winder, needle, and presser foot.
Correct setup minimizes issues and maximizes sewing enjoyment. Refer to your model’s specific manual for detailed instructions. A well-prepared machine ensures smooth operation and beautiful stitch results.
Threading the Machine (Upper Thread)
Begin by raising the presser foot; this opens the tension discs. Guide the thread from the spool, through the first thread guide, and around the tension discs. Continue threading through the take-up lever, ensuring it’s in its highest position. Next, lead the thread down through the needle clamp and finally, thread the needle from front to back.
Correct threading is crucial for consistent stitch formation. Always refer to your machine’s diagram for precise routing. A properly threaded machine prevents skipped stitches and ensures smooth operation.
Winding and Inserting the Bobbin (Lower Thread)
Start by placing the spool on the spool pin and guiding the thread to the bobbin winder. Wind the bobbin evenly, ensuring it isn’t too full. Once wound, carefully insert the bobbin into the bobbin case, following the diagram specific to your Singer model.
Thread the bobbin thread through the tension spring and guide it to the needle plate. Proper bobbin insertion and tension are vital for balanced stitches and preventing nesting. Always test the tension before beginning your project.
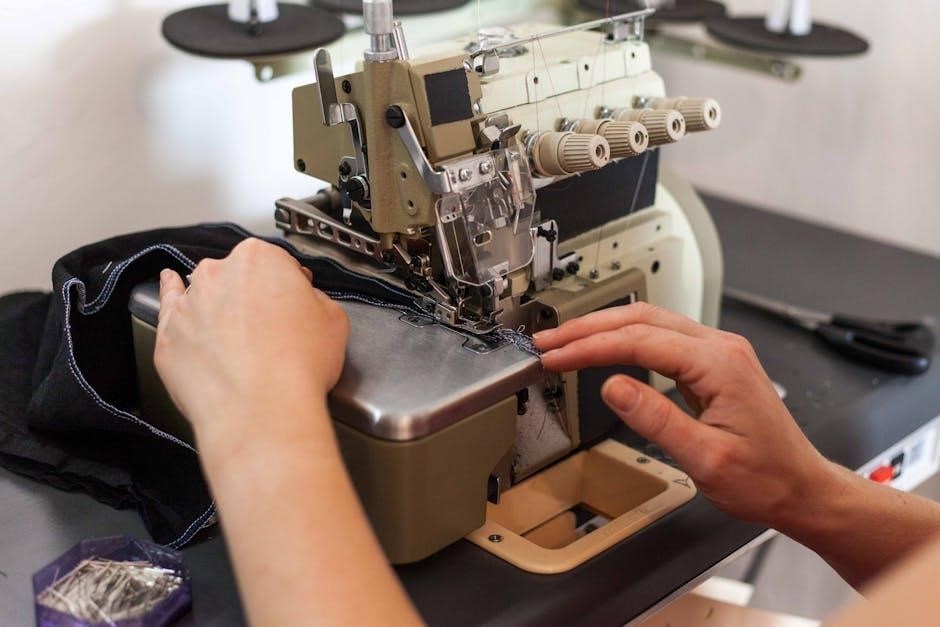
Basic Sewing Techniques
Mastering fundamental techniques unlocks your sewing potential. Begin with understanding stitch length and width adjustments, crucial for fabric type and desired effect. Practice consistent seam allowances using the guide on your machine’s needle plate. Learn to backstitch at the beginning and end of seams for secure finishing.
Proper fabric handling, including guiding the material smoothly and avoiding pushing or pulling, is key. Experiment with different presser foot pressures to achieve optimal stitch formation. These basics form the foundation for all sewing projects.
Straight Stitching: A Beginner’s Guide
Embark on your sewing journey with the straight stitch – the most fundamental technique; Select a stitch length appropriate for your fabric; shorter for delicate materials, longer for heavier ones. Thread the machine correctly and practice on scrap fabric first, maintaining a consistent speed.
Guide the fabric gently, keeping the edge aligned with the seam guide. Avoid pulling or pushing, letting the machine feed the fabric. Backstitch at the beginning and end to secure the seam. Consistent practice builds muscle memory and precision.
Zigzag Stitching: Applications and Settings
Explore the versatility of the zigzag stitch! Adjust stitch width and length for diverse applications – from finishing raw edges to creating decorative designs. A narrow zigzag prevents fabric fraying, while a wider stitch is ideal for stretch fabrics, allowing give without breakage.
Experiment with different settings on scrap fabric. Utilize zigzag for buttonholes (with appropriate foot), appliqué, and decorative embellishments. Mastering width and length control unlocks creative potential. Remember to test before sewing your final project!
Advanced Stitching Options
Unlock your Singer’s full potential with advanced stitch capabilities! Beyond straight and zigzag, explore buttonhole and decorative stitches. Buttonhole stitching requires a specific foot and precise settings – follow your model’s manual carefully for optimal results.
Decorative stitches add unique flair to projects. Experiment with various patterns to embellish garments, home décor, and crafts. Adjust stitch width and length for customized effects. Remember to practice on scrap fabric before applying to your final piece, ensuring desired aesthetic outcomes.
Buttonhole Stitching: Step-by-Step Instructions
Begin by attaching the buttonhole foot to your Singer machine. Select the buttonhole stitch setting, referencing your manual for the correct option. Place your fabric under the presser foot, aligning the buttonhole placement mark with the designated guide on the needle plate.
Slowly lower and raise the presser foot, allowing the machine to complete the buttonhole stitch sequence. Carefully remove the fabric and cut open the buttonhole, avoiding damage to the stitching. Practice on scrap fabric first to master the technique and achieve professional-looking results.
Decorative Stitching: Exploring Creative Possibilities
Unleash your creativity with Singer’s diverse range of decorative stitches! Select a stitch pattern from the dial or digital menu, consulting your machine’s manual for available options. Experiment with different stitch widths and lengths to achieve unique effects on fabric.
Use decorative stitches for embellishing garments, creating borders, or crafting personalized home décor items. Stabilize lightweight fabrics with interfacing for optimal stitch definition. Practice on scrap material to perfect tension and stitch placement before applying to your final project.
Troubleshooting Common Issues
Encountering problems? This section addresses frequent Singer sewing machine issues. Begin by re-threading the machine, ensuring correct tension. For thread breakage, check the needle for damage or incorrect size, and verify proper threading path. Skipped stitches often indicate a dull or bent needle; replace it immediately.
If fabric puckers, adjust the presser foot pressure or stitch length. Consult your manual for specific error codes and solutions. Regular maintenance, like cleaning and oiling, prevents many issues. Don’t force the machine; identify and resolve the root cause.
Thread Breakage: Causes and Solutions
Frequent thread breakage is frustrating, but often easily resolved. First, ensure correct threading – a misthreaded machine causes friction. Use quality thread appropriate for your fabric weight. A dull, bent, or incorrect needle size is a common culprit; replace it. Check the bobbin winding – uneven winding leads to breaks.
Verify proper tension settings; too tight or loose causes issues. Clean lint buildup around the tension discs. Finally, ensure the thread path is clear of obstructions. Consistent problems may indicate a need for professional servicing.
Skipped Stitches: Diagnosis and Repair
Skipped stitches indicate a problem with needle positioning or timing. Begin by re-threading both the upper and lower threads, ensuring correct placement. Confirm the needle is correctly inserted – it should be fully seated and facing the right direction. Use the correct needle type and size for your fabric; a mismatch causes skips.
Inspect the needle for damage (bent or blunt) and replace if necessary. Check the presser foot pressure; insufficient pressure can lead to skipped stitches. Finally, ensure the machine is properly timed – this often requires professional attention.
Maintaining Your Singer Sewing Machine
Regular maintenance extends your Singer’s lifespan and ensures optimal performance. Dust and lint buildup hinder smooth operation, so clean the machine frequently with a brush. Apply sewing machine oil to key moving parts – follow your model’s diagram for specific lubrication points. Avoid over-oiling, as excess attracts dust.
Periodically check the belt for wear and tear; a cracked or loose belt impacts stitch quality. Replace it promptly if needed. Consistent cleaning and lubrication prevent rust and maintain precision.
Regular Cleaning and Oiling
Consistent cleaning is vital for a smoothly functioning Singer. Power off and unplug the machine before starting. Use a soft brush to remove lint and dust from the bobbin area, feed dogs, and around the needle plate. A small vacuum attachment can also be helpful. Apply sewing machine oil sparingly to all moving parts, as indicated in your manual.
Focus on the bobbin case, shuttle hook, and any areas with visible friction. Wipe away excess oil to prevent buildup. Regular oiling ensures quiet operation and prevents wear.
Belt Replacement: A Practical Guide
A broken belt halts your Singer’s operation. Begin by removing the motor cover and unplugging the machine. Note the belt’s routing before removal – a photo is helpful! Carefully detach the old belt from both the motor pulley and the handwheel. Ensure the new belt is the correct size for your model.
Position the new belt onto the motor pulley, then stretch it over the handwheel. Double-check the routing against your reference. Reattach the motor cover and test the machine. A properly installed belt will provide smooth, consistent power.
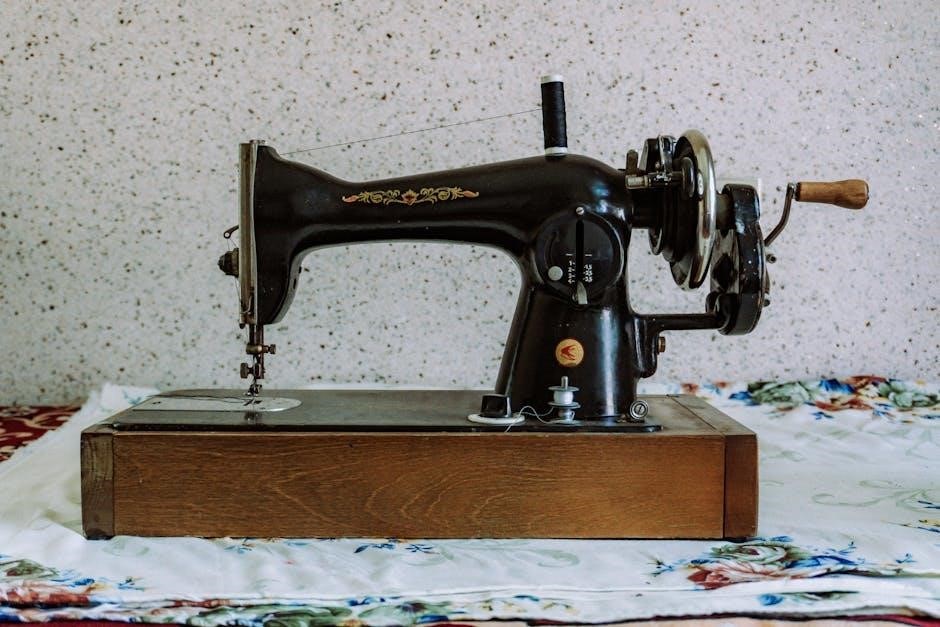
Singer Model 99K Specifics
The Singer 99K, a robust and popular machine, boasts a unique free-arm capability, ideal for cuffs and sleeves. Its distinctive aluminum body contributes to its durability. This model utilizes a long bobbin case, differing from later Singers. Understanding its specific threading path is crucial – consult dedicated 99K diagrams.
Oil regularly, focusing on the motor and gear mechanisms. The 99K often requires specific needle types for optimal performance. Numerous online resources and manuals cater specifically to this vintage machine, aiding restoration and repair.
Finding Replacement Parts
Locating parts for vintage Singer machines, like the 99K, requires diligence. Online auction sites (eBay) are excellent sources, alongside specialized sewing machine parts retailers. Many retailers offer bobbin cases, needles, belts, and even complete motors. Identifying your machine’s serial number is vital for accurate part matching.
Singer’s older parts are sometimes interchangeable across models, but verification is key. Forums dedicated to vintage Singers often have members selling or trading parts. Be prepared to potentially restore or clean used parts before installation.
Safety Precautions
Always disconnect the power supply before performing any maintenance, like changing the needle or belt. Never sew over pins or thick materials that could damage the needle or machine. Keep fingers away from the moving needle and presser foot during operation.
Ensure the machine is stable and on a level surface before use. Do not attempt repairs beyond your skill level; seek professional assistance. Regularly inspect the power cord for damage and replace if necessary. Supervise children when near the sewing machine at all times.
Resources and Further Learning
Expand your sewing knowledge through online resources! Numerous websites offer Singer sewing machine manuals and support forums for troubleshooting and advice. LinkedIn provides connections with professionals who can share expertise and insights. Explore dedicated online communities for specific models like the 99K.
Access digital archives containing manuals and contributions from fellow enthusiasts. Utilize these platforms to exchange ideas, discover creative possibilities, and enhance your sewing skills. Remember to verify information from multiple sources for accuracy;
Online Manuals and Support Forums
Discover a wealth of information through readily available online Singer sewing machine manuals. These digital resources offer convenient access to instructions and troubleshooting guides. Support forums connect you with experienced users and experts, fostering a collaborative learning environment.
Engage in discussions, ask questions, and share your own knowledge with the sewing community. Platforms like dedicated websites and social media groups provide valuable assistance and inspiration. Utilize these resources to overcome challenges and enhance your sewing journey;