Canon PIXMA MX490 Printer Manual: A Comprehensive Guide
This comprehensive guide offers detailed instructions for the Canon PIXMA MX490, including setup, operation, and troubleshooting, available as a PDF manual.
The Canon PIXMA MX490 is a versatile all-in-one printer designed for home and small office use. This printer combines printing, scanning, copying, and faxing functionalities into a single, compact device. Accessing the online manual provides useful functions and guidance. Canon offers this guide to ensure optimal performance and understanding of your printer’s capabilities.
The MX490 series boasts user-friendly features and reliable performance. Downloading the PDF manual is recommended for a readily available hard copy of instructions. It’s designed for compatibility across various operating systems, ensuring a smooth user experience.
Understanding the Printer’s Features
The Canon PIXMA MX490 offers a range of features designed for convenience and efficiency. It supports both USB and Wi-Fi connectivity, allowing flexible placement and easy sharing. Key features include high-quality printing, automatic document feeding (ADF) for streamlined scanning and copying, and a user-friendly control panel.
The manual details these functionalities, explaining how to utilize them effectively. It’s capable of printing from various applications and supports different paper types. Canon ensures users can maximize the printer’s potential through the provided PDF manual and online resources.
Setting Up Your Printer
Setting up your Canon PIXMA MX490 involves unboxing, driver installation, and connecting via USB or Wi-Fi, as detailed in the manual.
Unboxing and Initial Setup
Begin by carefully unboxing your Canon PIXMA MX490, ensuring all components are present. This includes the printer itself, power cord, print head, ink cartridges, and setup CD-ROM or instructions. Remove all protective tape and packaging materials, both inside and outside the printer.
Connect the power cord and turn the printer on. Follow the on-screen prompts for initial setup, which may include selecting your language and region. The printer will likely perform a self-test to ensure proper functionality. Refer to the manual for detailed diagrams and step-by-step guidance throughout this process, ensuring a smooth and successful start.
Installing Printer Drivers and Software
To ensure full functionality, install the latest Canon PIXMA MX490 drivers and software. You can use the included CD-ROM, but downloading from the Canon website is recommended for the most up-to-date versions. Download the appropriate package for your operating system (Windows or macOS).
Run the downloaded installer and follow the on-screen instructions. The software suite typically includes printer drivers, scanning utilities, and other helpful tools. During installation, you may be prompted to connect the printer via USB; follow these prompts carefully. A successful installation is crucial for optimal performance.
Connecting to a Computer (USB & Wi-Fi)
The Canon PIXMA MX490 offers both USB and Wi-Fi connectivity. For a USB connection, simply connect the printer to your computer using a standard USB cable. The printer should be automatically detected, or you may need to install drivers (see previous section).
For Wi-Fi setup, access the printer’s control panel and navigate to the network settings. Select your Wi-Fi network and enter the password. Once connected, you can print wirelessly from your computer or mobile devices. Ensure your computer and printer are on the same network.
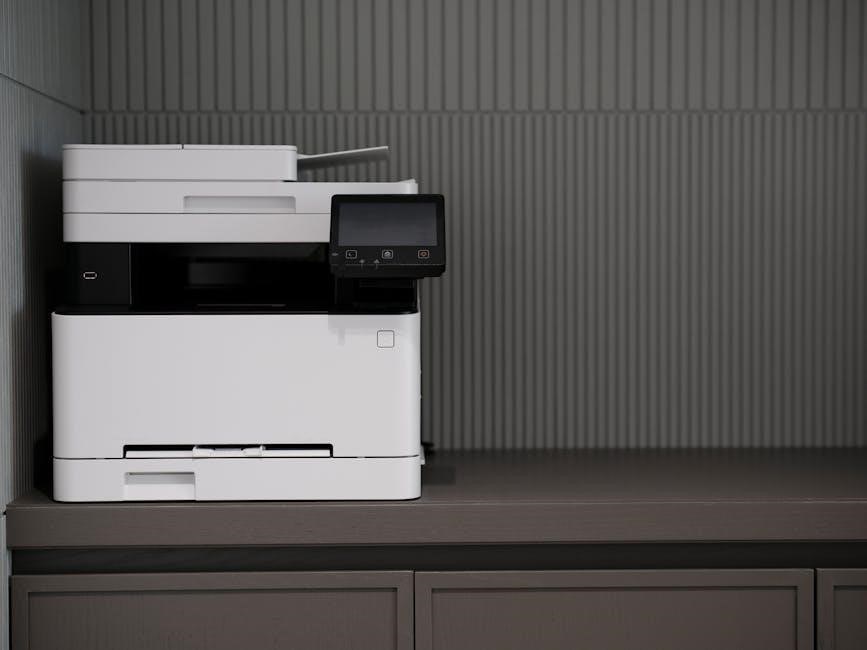
Using the Control Panel
The MX490’s control panel features an LCD screen and buttons for navigating settings, initiating functions, and monitoring printer status efficiently.
Navigating the LCD Screen
The Canon PIXMA MX490’s LCD screen serves as the central hub for accessing printer functions and settings. Utilize the directional buttons to move through menus, highlighting options like print, scan, copy, and setup. Press the ‘OK’ button to confirm selections.
The display provides real-time status updates, including ink levels, paper supply, and error messages. Explore the setup menu to configure network settings, adjust print quality, and customize other preferences. Familiarize yourself with the screen’s layout to efficiently manage your printing tasks. The screen’s responsiveness ensures smooth navigation.
Understanding Button Functions
The Canon PIXMA MX490 control panel features dedicated buttons for common tasks. The ‘Start’ button initiates printing, scanning, or copying. ‘Stop’ cancels current operations. Directional buttons navigate the LCD menu, allowing access to settings and options.
The ‘Select’ or ‘OK’ button confirms choices within the menu. Dedicated buttons for black & white and color printing offer quick access; The ‘Home’ button returns to the main menu. Understanding these functions streamlines operation, enabling efficient control over your printing needs without needing complex software navigation.

Printing Documents
Printing with the Canon PIXMA MX490 is straightforward from various applications; adjust quality and paper type settings via the control panel for optimal results.
Basic Printing Procedures
To initiate printing, ensure the Canon PIXMA MX490 is powered on and connected to your computer. Open the document or image you wish to print from your chosen application – such as Word or a web browser. Navigate to the “File” menu and select “Print.”
A print dialog box will appear, allowing you to specify the number of copies, page range, and printer selection (ensure the MX490 is chosen). Confirm your settings and click “Print” to begin. The printer will then process the job, feeding paper and delivering your printed document. Regularly check paper levels for uninterrupted printing.
Printing from Different Applications
The Canon PIXMA MX490 seamlessly prints from various applications. Whether using Microsoft Word, Adobe Reader, or a web browser like Chrome, the process remains consistent: select “File” then “Print.” Each application’s print dialog may vary slightly, but core options like page selection, number of copies, and printer choice will be present.
For image editing software, ensure correct color profiles are selected for accurate reproduction. When printing directly from web pages, preview the print area to avoid unwanted elements. Always verify printer settings within each application for optimal results.
Adjusting Print Settings (Quality, Paper Type)
The Canon PIXMA MX490 allows customization of print quality and paper type for optimal results. Access these settings through the printer driver’s “Properties” or “Preferences” menu. Quality options range from “Draft” for quick, economical prints to “High” for detailed images.
Paper type selection is crucial; choose from options like “Plain Paper,” “Photo Paper,” or “Envelope” to match your media. Incorrect settings can lead to poor print quality or paper jams. Experiment with settings to achieve desired output, considering ink usage and print speed.
Scanning Documents
The Canon PIXMA MX490 facilitates document scanning via its flatbed or ADF, supporting various formats like PDF and JPEG for versatile digital archiving.
Scanning with the Flatbed Scanner
Utilizing the flatbed scanner on your Canon PIXMA MX490 is ideal for scanning single sheets of paper, books, or delicate items. Ensure the document is placed face down on the glass platen, aligning it properly within the guides. Access the scan function through the printer’s control panel or software on your connected computer.
Select your desired scan settings, including resolution, color mode (color, grayscale, or black & white), and file format (PDF, JPEG, etc.). Preview the scan to confirm proper alignment and settings before initiating the final scan. The scanned image will then be saved to your designated location on your computer.
Scanning Using the Automatic Document Feeder (ADF)
The Canon PIXMA MX490’s Automatic Document Feeder (ADF) streamlines multi-page scanning. Load your documents face-up into the ADF tray, ensuring they are neatly aligned and not stapled or clipped. From the printer’s control panel or computer software, select the ADF as your scan source.
Configure scan settings like resolution, color mode, and file format (PDF, JPEG). Initiate the scan, and the MX490 will automatically feed and scan each page sequentially. The resulting digital file will be saved to your computer, simplifying bulk document digitization.
Scanning to Different Formats (PDF, JPEG)
The Canon PIXMA MX490 offers versatile scanning options, allowing you to save documents in various formats. For text-based documents, PDF is ideal, preserving formatting and enabling searchable text. Choose PDF within the scan settings on the printer’s control panel or scanning software.
For photos or images, JPEG is a suitable choice, offering good compression and image quality. Select JPEG as your desired format before initiating the scan. Experiment with different resolution settings to balance file size and image detail, tailoring the output to your specific needs.
Copying Documents
The Canon PIXMA MX490 facilitates quick document duplication, offering adjustable settings for darkness and paper size to meet diverse copying requirements.
Making Basic Copies
To initiate a basic copy with your Canon PIXMA MX490, ensure an original document is placed on the flatbed scanner or within the Automatic Document Feeder (ADF). Press the “Copy” button on the control panel. The printer will automatically begin copying, producing a single duplicate of your original.
You can adjust the number of copies using the operation buttons. The LCD screen will display the selected copy quantity. For multiple copies, simply input the desired number. Press the “Start” button to confirm and begin the copying process. The copied document will then be outputted to the paper tray.
Adjusting Copy Settings (Darkness, Paper Size)
Fine-tune your copies using the Canon PIXMA MX490’s control panel. To adjust darkness, access the “Copy” settings via the LCD screen and select “Density.” Utilize the arrow buttons to increase or decrease the darkness level for optimal clarity.
For paper size adjustments, navigate to the “Paper Size” option within the copy settings. Choose the appropriate size matching your original document and desired copy output. Confirm your selections before initiating the copy process to ensure accurate reproduction. These adjustments enhance copy quality.
Troubleshooting Common Issues
Resolve frequent problems like paper jams, connectivity errors, and decipher error messages with this section’s guidance, ensuring smooth Canon PIXMA MX490 operation.
Paper Jams and Solutions
Paper jams are a common issue with any printer, and the Canon PIXMA MX490 is no exception. This section provides detailed steps to safely remove jammed paper from various locations within the printer, including the paper tray, the rear access area, and inside the printer itself.
Crucially, always power off the printer before attempting to clear a jam to avoid potential damage or injury. We’ll cover identifying the jam location, gently extracting the paper without tearing, and preventing future occurrences through proper paper loading techniques. Following these instructions carefully will restore your printer to optimal functionality.
Connectivity Problems and Fixes
Establishing a stable connection is vital for seamless printing. This section addresses common connectivity issues with the Canon PIXMA MX490, covering both USB and Wi-Fi connections. Troubleshooting steps include verifying cable connections, restarting the printer and computer, and reinstalling printer drivers.
For Wi-Fi issues, we’ll guide you through re-entering your network password, checking your router settings, and utilizing Canon’s diagnostic tools. Ensuring your printer and computer are on the same network is key. These solutions will help restore reliable communication and printing capabilities.
Error Messages and Their Meanings
The Canon PIXMA MX490 utilizes error messages to communicate issues; This section decodes common messages displayed on the LCD screen, providing clear explanations and suggested solutions. Frequent errors include “Paper Jam,” “Ink Low,” and connectivity-related codes.
Understanding these messages is crucial for efficient troubleshooting. We’ll detail the meaning of each code, outlining steps to resolve the problem – from clearing paper jams to replacing ink cartridges or addressing network connectivity. Refer to this guide to quickly diagnose and fix printer malfunctions, minimizing downtime.
Maintenance and Care
Regular maintenance ensures optimal performance of your Canon PIXMA MX490, including print head cleaning, ink cartridge replacement, and proper operating conditions.
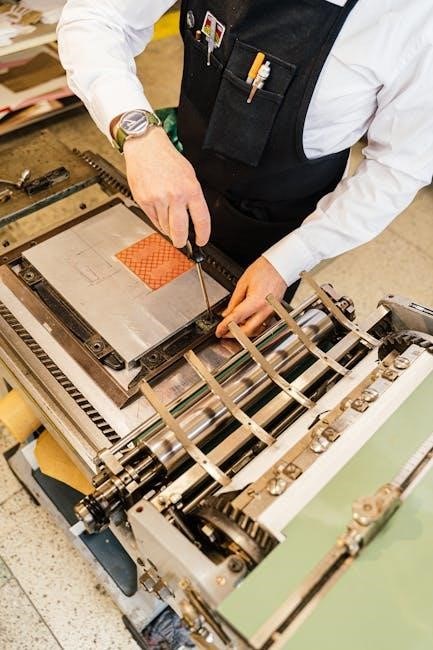
Cleaning the Print Head
Maintaining a clean print head is crucial for optimal print quality with your Canon PIXMA MX490. Over time, ink can dry and clog the nozzles, leading to streaks or faded prints. The printer offers a built-in print head cleaning function, accessible through the control panel or printer software on your computer.
To initiate cleaning, navigate to the maintenance settings. Multiple cleaning cycles may be necessary for stubborn clogs, but avoid excessive cleaning as it consumes ink. After cleaning, it’s recommended to print a nozzle check pattern to verify the results and ensure all nozzles are functioning correctly. Refer to the full manual for detailed step-by-step instructions and troubleshooting tips.
Replacing Ink Cartridges
Replacing ink cartridges in your Canon PIXMA MX490 is a straightforward process. The printer will typically notify you when ink levels are low via a warning message on the LCD screen or within the printer software. Ensure you have replacement cartridges readily available before starting.
To replace a cartridge, open the printer cover and allow the print head to move to the replacement position. Gently remove the empty cartridge and install the new one, ensuring it clicks securely into place. Follow the on-screen prompts or the manual’s instructions for proper installation and initialization of the new cartridge.
Printer Operating Environment
Optimal performance of your Canon PIXMA MX490 relies on maintaining a suitable operating environment. This printer is designed to function correctly within a temperature range of 50°F to 86°F (10°C to 30°C). Humidity should be between 10% and 90%, non-condensing, to prevent damage to internal components.
Avoid direct sunlight and dusty locations. Ensure the printer is placed on a stable, level surface. The manual specifies compatibility with various operating systems, including OS X Mavericks v10.9 and later, ensuring correct display of the PDF manual across different platforms.